
What is Version Control?
Version Control systems help software engineers and their teams to manage the changes in the source code of software over time. If an error has occurred in a later version of the code the team can go back in time to use a previous code to fix the error. Version Control is helpful when working in a team where each team member is developing a different function to the system. With the help of Version Control System, each software developer can track and manage their changes in the source code and make the software better.
Why Git?
Git is the most popular Version Control System among other VCSs. In Git a client can get a clone of the system with all the changes in the source code in the past. After getting a clone of the system, the client can roll back to a previous version of the system. Git is a Free and Open Source VCS and it is fast than most other VCSs.
Git Gui Download Link: Download Git ( https://gitforwindows.org/)
Using Git Gui :
1)Starting a new Repository
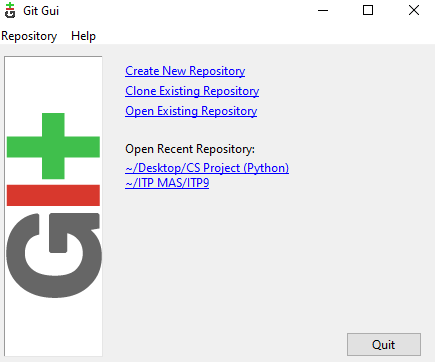
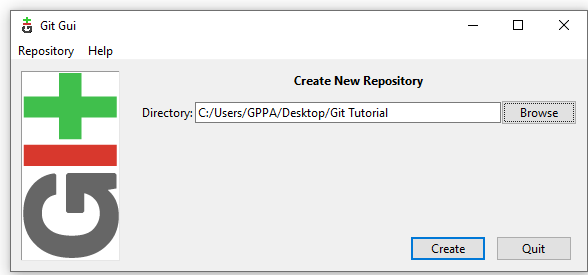
First start Git and select ‘Create New Repository’ and then select the folder directory
Here I have created a folder and made a ‘Readme.txt’ file with some texts inside the file for demonstration.
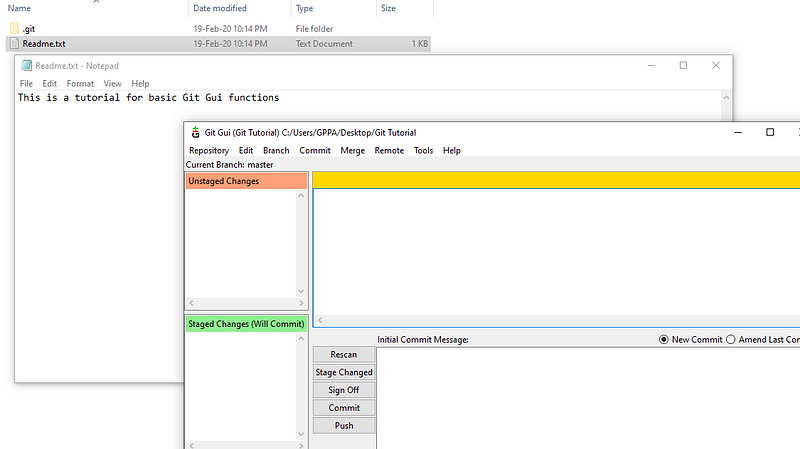
If the file is not shown in the Unstaged Changes Window in the main Git Gui window press the Rescan button. Then to click the Stage Changed button. Then a Confirm window will be shown to add the untracked file. Untracked means Git sees a file that it didn’t have in the previous commit. Git doesn’t add untracked files automatically because they can be binary files that were automatically created which are unnecessary to the system. Because of that Untracked files must be explicitly included.
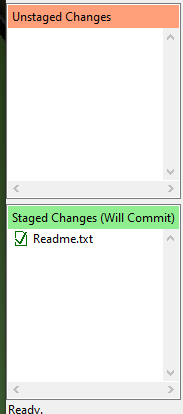
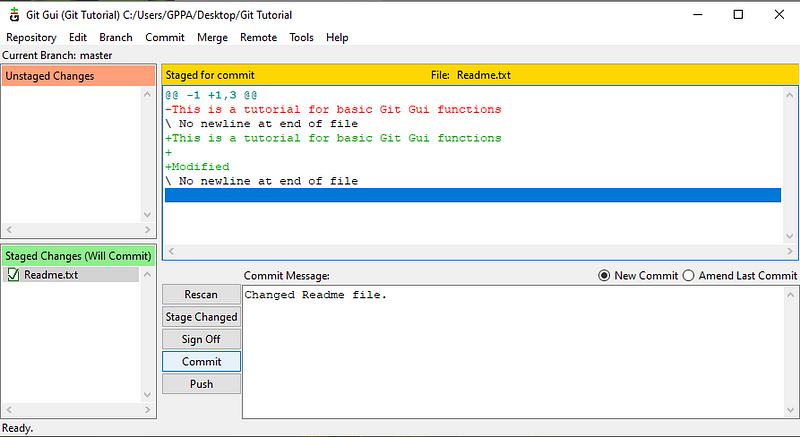
After Staging the file it will appear in the Staged Changes window. For Unstage the file simply drag and drop it in the Unstaged changes window in the Git Gui. Or press the Commit option in the menu bar and select Unstage from Commit.
Then Commit the changed file with a Commit Message.
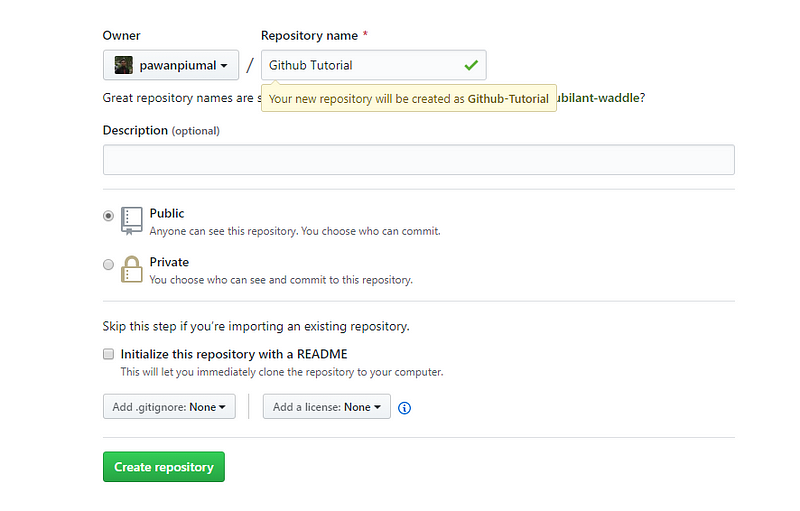
Before pushing the repository to Github we need to create a repository in Github site. First login to www.Github.com and create a new Repository. Then copy the repository link shown.
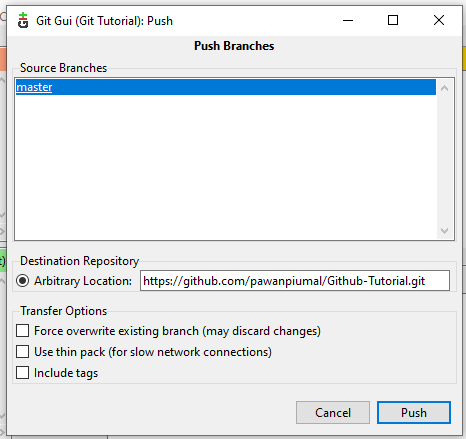
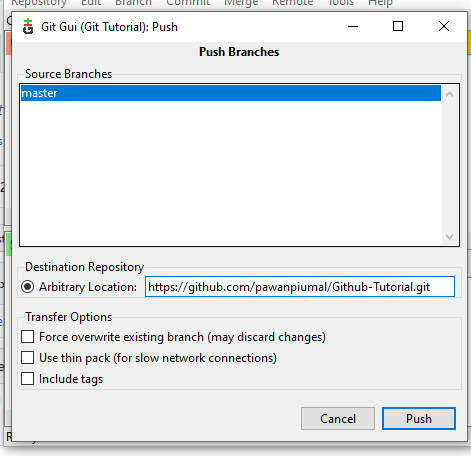
Then press the push button in the Git GUI window. Then paste the link copied earlier in the Destination Repository panel in the opened window. And press push. Now the commit has been pushed to the Master branch. If you went into the repositories tab in your github.com profile the Repository will be there with the files.
2) Cloning a Repository
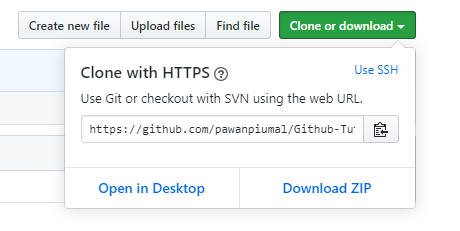
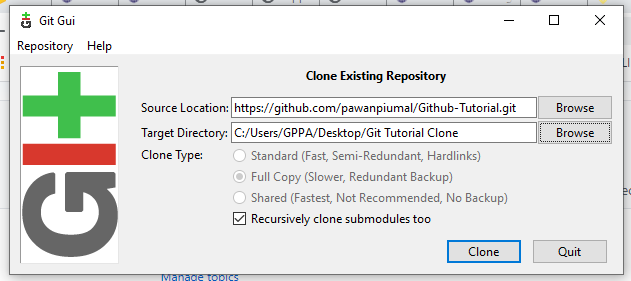
First, we need to get the cloning repository link. To do that we need to get to the GitHub site. Then press the Clone or Download button and copy the link to the repository. Then open the Git Gui and press Clone Existing Repository. Then paste the link copied into the Source Location tab. In the Target Location select the destination folder path to a selected folder. And press the clone button.
3) Updating the Master Branch
First, we need to modify the files. To demonstrate I have changed the Readme.txt file. Then in the Git Gui window press, the rescan button. After that, you can see the Changed file name in the Unstaged Changes panel. This file is now tracked and modified. To stage the file press the Stage Changed button. Now commit and push the commit into the Master Branch.
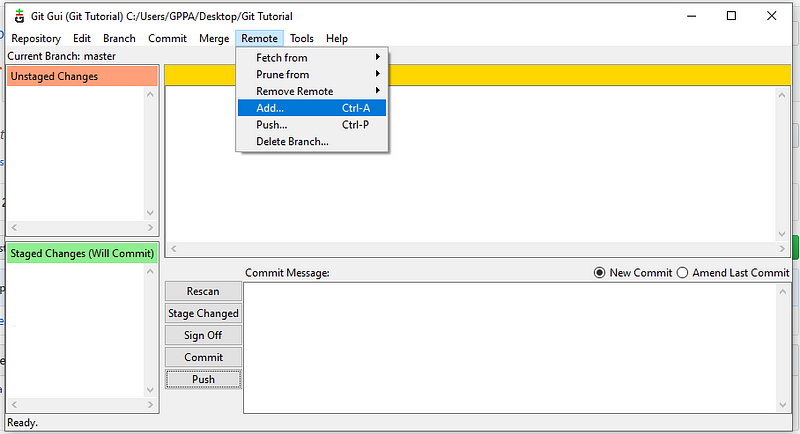
To push the commit into the master branch we need to paste the Destination Repository Location Every time. To ease the process we can add the Remote location. If you Cloned the Repository a remote named origin is already added to the remote list. So you do not need to do the process. To do that go the Remote in the menu bar and press Add.
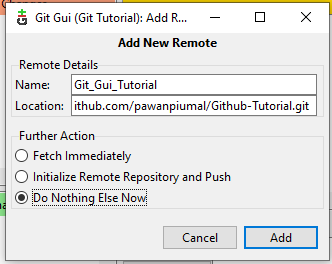
Then fill the Entries and press add to add the remote.
After that when pushing into the master branch we can simply select the Remote in the push Window.
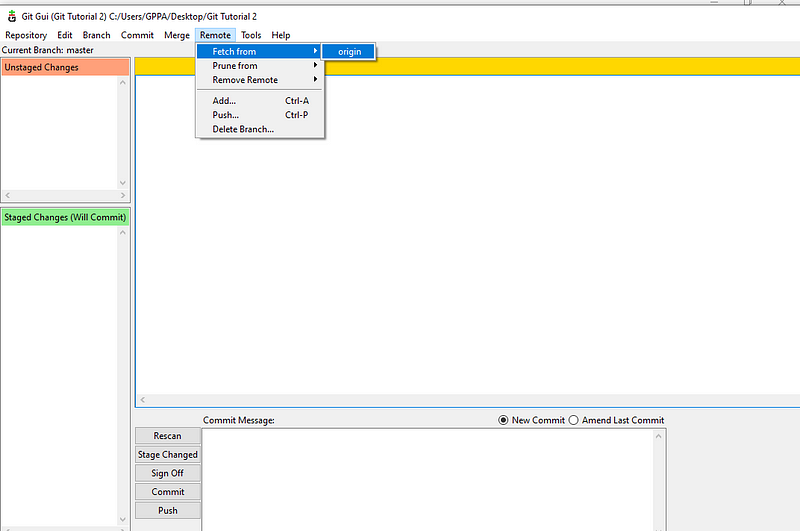
4) Fetching Changes
To pull the changes we need to go to the Remote in the menu bar and press fetch from on the menu. Then select the Remote location from the list. If you cloned the repository the remote name will be origin. But if you made the repository you need to add the remote first using the add option.
Then you need to Merge the changes to the local branch. To do that we need to use the Merge option in the menu bar. Then press local merge in the list. After that, you can see the Changes fetched from the Master Branch.
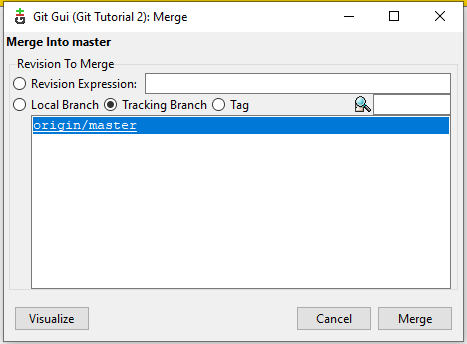
If you need to watch the changes you can press the Visualize button. To merge the files Press the Merge Button.
This is the Basics of the Git.
Thank you.
Same Article can be found in my Medium Account:- https://medium.com/@pawanpiumal1/basics-of-git-gui-71366702fc26
Same Article can be found in my Medium Account:- https://medium.com/@pawanpiumal1/basics-of-git-gui-71366702fc26